Tenancy Check-Out Report: What Landlords Should Record at the End of a Tenancy
A practical landlord guide to tenancy check-out reports, end-of-tenancy inspections, deposit evidence and the records to keep before returning or deducting from a deposit.
Key takeaways
- A tenancy check-out report records the property’s condition at the end of the tenancy and compares it with the original check-in inventory.
- The report should cover more than damage: include cleaning, keys, meter readings, missing items, tenant comments, photos, invoices and follow-up actions.
- For a proposed deposit deduction, the strongest position is usually based on documentary evidence, the check-in inventory, actual cost information, fair wear and tear and the tenancy agreement — not memory or guesswork.
- A signed check-out report can help, but it does not guarantee that a tenant, deposit scheme or court will accept a proposed deduction.
- The completed report is most useful when it is stored with the photos, videos, quotes, invoices and tenant messages it refers to.
A tenancy check out report records a rental property’s condition at the end of the tenancy and compares it against the check-in inventory. This landlord guide explains exactly what to record, rooms, cleaning, damage, meter readings, keys and deposit evidence and includes a free check-out report template you can download.
The tenant has moved out, the keys are on the kitchen worktop, and you are standing in the property with your phone wondering what to record first. A clear check-out report helps you organise the end condition of the property, compare it with the check-in evidence, and keep related photos, messages, invoices and follow-up actions together.
This article focuses on standard private residential tenancies in England. HMOs, commercial property and properties outside England may involve different or additional requirements.

What is a tenancy check-out report?
A tenancy check-out report is the end-of-tenancy record of the property’s condition. It is usually prepared after the tenant has moved out, or at the final inspection if the tenant is present and ready to hand back the property.
Some agents may also refer to related documents as an inventory, check-in report, check-out inventory or schedule of condition. The important point is the same: the end record should be compared against the starting evidence.
The useful comparison is not “does the property look perfect?” The useful comparison is “what has changed since check-in?”
For example, a landlord might have a three-year-old check-in inventory from a letting agent, but the agent no longer manages the property. At check-out, the landlord needs to compare the lounge carpet, oven, bathroom sealant, garden, keys and meter readings against that original record, not just take 40 unlabelled photos and hope they make sense later.
A good tenancy check-out report should record:
- Property address and tenancy dates.
- Inspection date and time.
- Who completed the inspection.
- Whether the tenant or agent was present.
- The check-in inventory or photo set used for comparison.
- Room-by-room condition.
- Cleaning condition.
- Damage, missing items and possible fair wear and tear issues.
- Meter readings.
- Keys, fobs, permits and access items returned.
- Photo, video, invoice and message references.
- Follow-up actions and any proposed deposit deductions.
This applies even where you expect to return the full deposit. A clean check-out report can still help you close the tenancy neatly, record meter readings, confirm keys were returned and avoid confusion if a question comes back later.
Tenant present and tenant not present are both workable scenarios. If the tenant attends, record any comments or disagreements calmly. If the tenant is absent, record that they were not present and complete the report using dated evidence, the check-in inventory and any written communication.
Free tenancy check-out report template
Download the free tenancy check-out report template and use it to record room-by-room condition, meter readings, keys, photos, cleaning, damage and follow-up actions.
Why the tenancy check-out report matters for deposit deductions
Deposit decisions depend on evidence. Not memory. Not frustration. Not what the property “must have been like” when the tenant moved in.
Tenancy deposit protection is part of the legal framework for private renting. Section 213 of the Housing Act 2004 sets out requirements relating to tenancy deposits, and GOV.UK explains that a landlord or letting agent must put a deposit in a government-approved scheme within 30 days of receiving it.
At the end of the tenancy, GOV.UK says the landlord must return the deposit within 10 days of both sides agreeing how much the tenant will get back. If there is a dispute, the deposit stays protected through the tenancy deposit protection scheme until the issue is resolved.
That means the check-out report sits at an important point in the process. It helps you decide what is fair to return, what may need discussing with the tenant, and what evidence supports any proposed deduction.
For deposit dispute evidence, the strongest check-out report usually connects the check-in inventory, dated photos, invoices or quotes, tenant messages and the final deduction calculation.
The Deposit Protection Service describes check-out as a chance for the landlord and tenant to review the property’s condition, agree any deposit deductions and gather evidence to support a claim. DPS also lists useful dispute evidence such as signed check-in and check-out inventory reports, tenancy agreements, inspection reports, invoices, estimates, receipts, date-stamped photos or videos, correspondence and witness statements in its common dispute questions.
TDS guidance also treats the check-out report as evidence of the property’s condition at the end of the tenancy, especially when used with the check-in report or inventory and supporting photos or videos.
A practical example: the check-in inventory says the kitchen was “professionally cleaned, oven clean, no grease marks”. At check-out, the oven is heavily soiled. If you want to discuss a cleaning deduction, the report should link the kitchen section to photos, the check-in wording, tenant comments, and any cleaning invoice or quote. Without that chain, the discussion becomes harder.
Important: a check-out report helps support a fair, evidenced decision. It does not decide liability on its own, and it does not guarantee that a deduction will be accepted. If there is a disagreement about the deposit, use the relevant tenancy deposit scheme’s repayment or dispute process and keep copies of the messages, evidence submitted and outcome.
For the wider deposit process, see our tenancy deposit protection checklist so you can separate deposit protection obligations from check-out evidence gathering.
How to complete a tenancy check-out report
Start before you enter the property. A check-out inspection done with no check-in inventory, no key list and a half-charged phone usually creates gaps.
Here is a practical sequence for a standard buy-to-let landlord managing a private residential tenancy in England.
1. Prepare before the inspection
Find the check-in inventory, check-in photos, tenancy agreement and any schedule of keys, fobs, permits or supplied items. If the property was previously managed by an agent, check your letting agent handover records before the tenant leaves, not after.
Prepare the check-out report template in advance. Add the property address, tenancy dates, tenant names, inspection date, inspection time and the name of the person completing the report.
Invite the tenant to attend the check-out inspection where practical and keep a copy of that invitation. Complete the check-out as soon as reasonably possible after the keys are returned, so the report reflects the property’s condition at handover.
2. Record attendance and timing
Write down whether the tenant was present. If an agent, contractor or witness attends, record that too. Once the report is complete, send the tenant a copy and keep a record of when it was sent.
Date and time matter because a deposit dispute may later turn on whether photos were taken at check-out, before cleaning, after cleaning, before contractor work or after a re-let viewing. If lighting affects photos, for example a dark hallway or a mark only visible near a window then note that in the report.
3. Start with keys and access items
Record each key or access item returned:
- Front door keys.
- Back door or patio keys.
- Window keys.
- Garage, shed or meter cupboard keys.
- Fobs, access cards and parking permits.
If a front door key is missing and you decide to change the lock, record the reason, the date and the invoice reference. Do not leave this as “key issue” in a WhatsApp thread.
4. Take meter readings
Record gas, electricity and water readings where applicable. Photograph each meter clearly enough that the number, meter type and date context can be understood.
A simple example is: “Electricity meter, under-stairs cupboard, 30 June 2026, reading 18422. Photo E1.” That is much easier to use later than a random image named IMG_4817.
5. Inspect room by room
Use the same order each time: entrance, hallway, lounge, kitchen, bathroom, bedrooms, garden, garage or outbuildings.
For each room, record cleanliness, walls, flooring, windows, blinds or curtains, fixtures, fittings, supplied furniture and appliances. If something is damaged or missing, note the check-in condition and check-out condition side by side.
6. Take labelled check-out photos
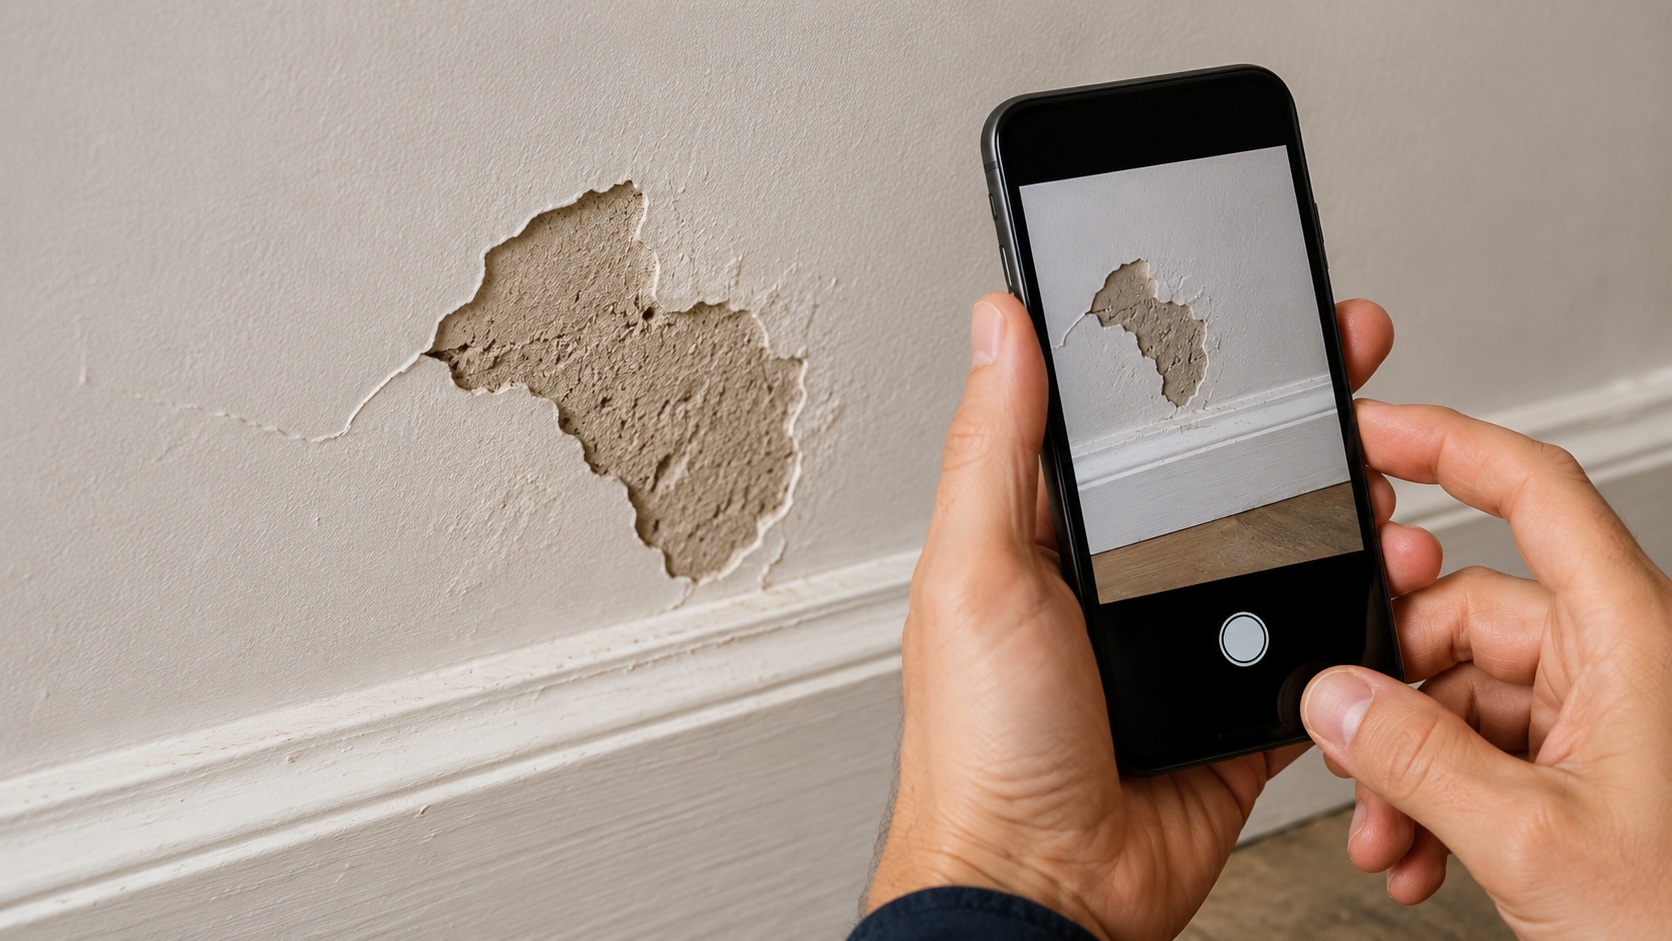
Take wide shots first, then close-ups. The wide shot shows where the issue is. The close-up shows the detail.
For example, take one wide photo of the bedroom wall and one close-up of the large fixing holes. Label them “Bedroom 1 wall — B1 and B2” in the report. Deposit-scheme evidence is easier to follow when photographs are dated, labelled and connected to written notes.
7. Compare check-out findings with the check-in inventory
The check-out report is strongest when it compares like with like.
If the check-in inventory says “lounge carpet: fair condition, existing wear to doorway”, do not simply write “carpet damaged” at check-out. Record what is new, what was already there, and whether the issue appears to be normal use, cleaning, damage or missing evidence.
This is where fair wear and tear matters. mydeposits explains that fair wear and tear covers reasonable deterioration through normal use, while betterment becomes an issue if the landlord claims in a way that would leave the property or item better than it reasonably should be at the tenant’s expense.
8. Record actions required
Separate the condition record from the action list.
The condition record says what you found. The action list says what happens next: cleaning quote requested, replacement blind needed, contractor contacted, tenant asked for comments, deposit discussion opened, invoice uploaded.
This helps stop the report becoming muddled.
9. Calculate proposed deposit deductions after the inspection
Do not invent figures during the inspection unless the cost is already known.
It is usually better to gather quotes, invoices, receipts or contractor estimates, then calculate a reasonable proposed deduction after considering the tenancy agreement, starting condition, age and quality of the item, tenancy length, fair wear and tear and betterment. mydeposits also warns that deductions can become weak where inventories are poor, invoices are too generic, or fair wear and tear and betterment have not been considered.
10. Save the complete evidence bundle
A check-out report is only useful if the evidence behind it can be found.
Save the report with the photos, videos, tenant emails, WhatsApp screenshots if relevant, cleaning invoices, repair quotes, deposit scheme messages and final deposit calculation. For retention planning, link this to your internal guide on how long landlords should keep records.
Tenancy check-out report checklist
Use this end of tenancy inspection checklist as the core of your end of tenancy inspection report. It works best when each note points to a photo, invoice, message or document reference. If you searched for a “tenancy check out report”, this is the practical record you are trying to create.
Property address and tenancy dates
Confirms which tenancy the report relates to.
Check-out inspection date and time
Creates a clear timeline.
Person completing the report
Shows who inspected and recorded the evidence.
Tenant attendance
Records whether the tenant was present, absent or refused to sign.
Check-in inventory reference
Links end condition to starting condition.
Room-by-room condition
Creates a structured record rather than random notes.
Cleaning condition
Supports any cleaning discussion or deduction.
Damage beyond fair wear and tear
Identifies issues needing evidence and cost support.
Missing items
Connects check-out findings to inventory items.
Meter readings
Helps close utility records and avoid later confusion.
Keys, fobs and permits returned
Supports access and security decisions.
Photos and video references
Makes visual evidence easier to match to the report.
Repair or replacement actions
Shows what needs doing next.
Quotes, invoices or receipts
Supports cost calculations.
Tenant comments or disagreement
Records the tenant’s position if present.
Deposit deduction summary
Keeps deduction reasoning transparent.
Evidence location
Shows where photos, invoices and messages are stored.
A landlord with three flats in the same city might complete three check-outs in one month. Without a consistent report, it is easy to mix up which property had the missing parking permit, which one needed carpet cleaning and which tenant queried the oven condition.
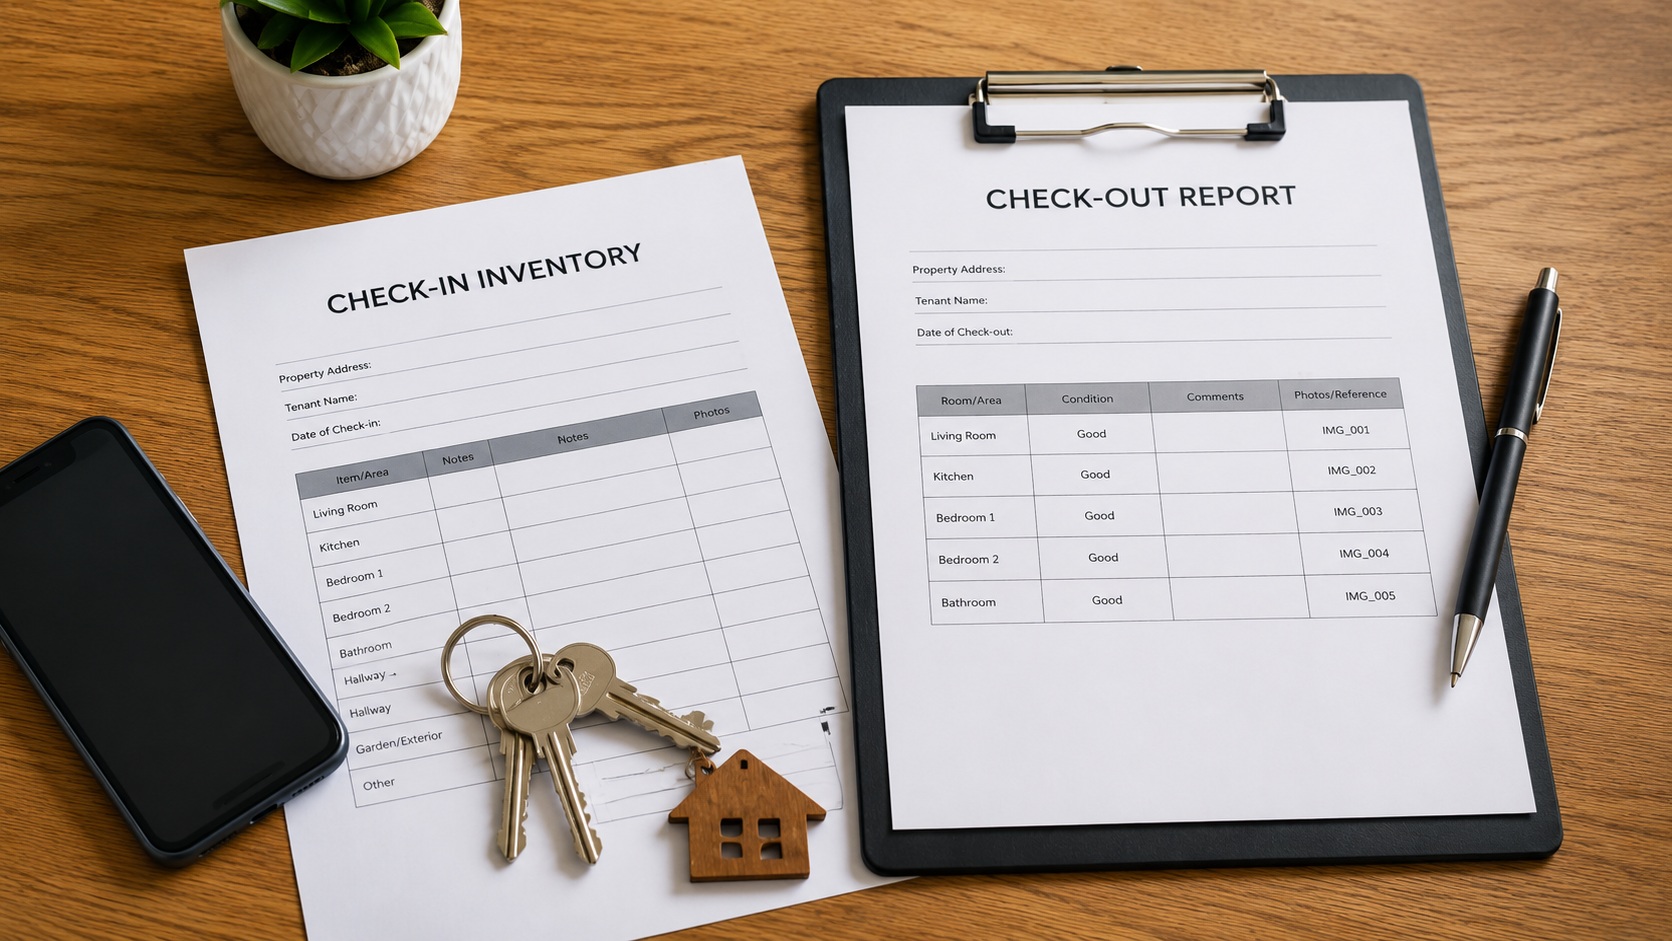
The template includes sections for meter readings, keys, photos, room-by-room condition, cleaning, damage and follow-up actions. You can also track wider property evidence in a landlord compliance spreadsheet, but the check-out report should remain the main end-of-tenancy record.
For deposit disputes, mydeposits says evidence should clearly show the condition of the property at the start and end of the tenancy, and deposit-scheme guidance commonly points to check-in reports, check-out reports, dated photos, invoices, receipts, contractor quotes, communications and the tenancy agreement.
Common tenancy check-out mistakes landlords make
The most common check-out mistakes are not dramatic. They are ordinary admin gaps that make a fair decision harder to explain later.
Doing the check-out without the check-in inventory
Without starting evidence, it is harder to show what changed.
For example, if a bedroom carpet is stained at check-out but there is no check-in photo or written description, the discussion becomes weaker. TDS notes that, where a tenant challenges deductions, documentary evidence such as an inventory or check-in report is usually important.
Taking photos but not labelling them
Random photos are weaker than referenced evidence.
Instead of keeping 80 images in your phone gallery, label them by room and issue: “Kitchen oven K3”, “Bathroom basin B2”, “Garden fence G1”. If the photo supports a proposed deduction, the report should say exactly which photo supports it.
Only recording damage
A good tenancy check-out report records the whole end-of-tenancy position, not just problems.
That includes cleaning, keys, meters, missing items, tenant comments, garden condition, contractor actions and deposit correspondence. This also helps when the property is being re-let quickly and you need to separate tenant issues from normal turnaround work.
Mixing fair wear and tear with damage
Fair wear and tear is not the same as tenant damage.
Small scuff marks, faded paint or worn carpets may be normal depending on the length of tenancy, item age, quality and use. Stains, burns, large holes or missing items may need a different assessment. mydeposits also explains that betterment should be considered, such as where a landlord tries to replace an older item with a new one at the tenant’s full expense.
Agreeing deductions too quickly
The inspection is for recording evidence. The deduction calculation can come after.
A fair approach is to inspect, compare, gather quotes or invoices, consider fair wear and tear, then explain proposed deductions clearly. That is better than saying “£300 for cleaning and damage” at the door with no cost basis.
Losing evidence after the inspection
A familiar landlord problem: the report is in Word, photos are on a phone, the cleaning invoice is in email, tenant comments are in WhatsApp, and the deposit scheme message is in a portal.
That scattered setup may be fine until someone asks for proof. Then it becomes slow and stressful. The check-out report should point to one organised evidence bundle by property.
Using a template without adapting it
A template is a starting point, not a guarantee.
A one-bedroom flat, a furnished family house and a part-furnished let all need different levels of detail. HMOs and shared properties may involve extra considerations, so do not treat a standard BTL template as HMO operational guidance.
Download the free tenancy check-out report template
The free tenancy check-out report template is designed for private landlords who want a practical end-of-tenancy inspection record rather than a blank page.
Use it to record:
- Property and tenancy details.
- Check-in inventory references.
- Keys, fobs and permits.
- Gas, electricity and water readings.
- Room-by-room condition.
- Cleaning.
- Damage and missing items.
- Photo and video references.
- Quotes, invoices and receipts.
- Tenant comments.
- Deposit deduction summary.
- Follow-up actions.
Use the template before you inspect the property
Download the free tenancy check-out report template and adapt it to your property, tenancy agreement and deposit scheme process.
The template is for general record-keeping only. It does not guarantee that a deduction will be accepted by a tenant, deposit scheme, court or adviser.
FAQs
What is a tenancy check-out report?
A tenancy check-out report is a written and photographic record of the property’s condition at the end of the tenancy. It should usually compare the property with the check-in inventory, including room condition, cleaning, damage, missing items, meter readings, keys and tenant comments.
Does a landlord have to do a check-out report?
A landlord should usually complete a check-out report if they want a clear end-of-tenancy record, especially where cleaning, missing items, damage or deposit deductions may be discussed. It is a record-keeping document, not a guarantee that a tenant, deposit scheme or court will accept a deduction. Check the tenancy agreement, deposit scheme guidance and professional advice if you are unsure.
What if there is no check-in inventory?
If there is no check-in inventory, the check-out report may still help record the end condition, but it may be harder to show what changed during the tenancy. Keep dated photos, invoices, tenant messages and any other starting evidence you do have, and take advice before making disputed deductions.
What should be included in a tenancy check-out report?
Include the property address, tenancy dates, inspection date and time, tenant attendance, check-in inventory reference, room-by-room condition, cleaning, damage, missing items, meter readings, keys returned, photo references, tenant comments, follow-up actions and any proposed deposit deductions.
Can a check-out report be used for deposit deductions?
Yes. A check-out report can support deposit deduction discussions or a deposit scheme dispute if it is clear, dated and linked to the check-in inventory, photos, invoices, quotes and tenant communications. It does not guarantee that the deduction will be accepted.
Should the tenant sign the check-out report?
Tenant acknowledgement can help, especially if it confirms attendance and receipt of the report. It should be clear whether the signature only acknowledges the inspection or also confirms agreement with specific findings. If the tenant refuses to sign or is not present, record that calmly and keep the supporting evidence.
Is a check-out report the same as an inventory?
No. The inventory or check-in report records the starting condition at the beginning of the tenancy. The check-out report records the end condition and compares it with that starting evidence.
Keep your check-out report with the rest of your landlord evidence
The practical takeaway is simple: complete the check-out report before the details blur. Record the condition, link every issue to evidence, and keep the report with the photos, invoices, quotes and tenant communications it relies on.
Turn scattered check-out evidence into a clear property record
CertNudge helps you store the completed check-out report alongside the wider property record, including photos, invoices, certificates and notes, so the evidence is easier to find when someone asks for proof.
View the sample compliance pack
Sample only. This is not legal advice, certificate verification, or a guarantee that any tenant, deposit scheme, court, adviser or third party will accept every record.
Information only: This article is for general information only and is not legal advice. Regulations change and individual circumstances vary. Always check the latest guidance at GOV.UK or speak to a qualified housing professional or solicitor.
Last reviewed: 30 June 2026
Next review recommended: 30 June 2027